Example Detailed Mass Offset Search - Histone PTMs
This example will demonstrate a detailed mass offset (DMO) search for rare PTMs in a histone protein dataset. The data is from the paper Breaking Boundaries in Histone Modification MS-based Detection: A Tailored Search Strategy for Unrestricted identification of novel epigenetic marks, which can be referenced as a guide.
Preparation
Install FragPipe if you have not done so already (instructions can be found here)
Download the raw data from ProteomeXchange(https://proteomecentral.proteomexchange.org/cgi/GetDataset?ID=PXD061934) or PRIDE (https://www.ebi.ac.uk/pride/archive/projects/PXD061934). These 3 raw files are the ones used in the tutorial:
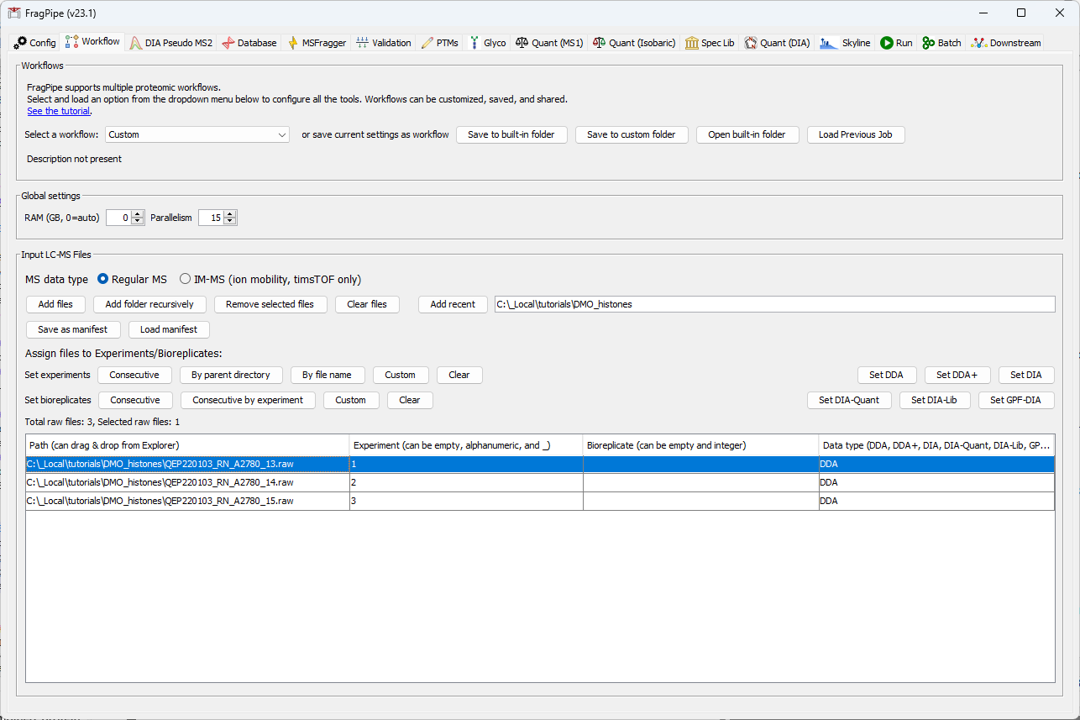
- QEP220103_RN_A2780_13.raw
- QEP220103_RN_A2780_14.raw
- QEP220103_RN_A2780_15.raw
Download the custom workflow and fasta file:
A custom workflow with histone modifications and PTMs has been prepared and can be downloaded here.
The analysis uses a custom fasta file containing the sequences for human histone proteins and common contaminants, which can be downloaded here.
A few changes have been made relative to the analysis published in the referenced paper. If you would like to reproduce that analysis exactly, the workflow file and fasta file used can be downloaded from the ProteomeXchange repository.
Set up the FragPipe Run
1) Load the custom workflow from the workflows menu on the Workflow tab (see the highlighted red box at the top of the screenshot below) 2) Load the .raw files to the LC-MS files table (using the Add Files button) and assign the files to experiments. Note that experiments are needed to generate summary tables for label-free quantification, but are not needed for qualitative PTM searching and can be skipped.
- Load the custom FASTA file on the Database tab.
4.(optional) Review and adjust any parameters. The provided custom workflow is already optimized for this analyiss, so nothing needs to be changed prior to running. However, for other analyses, common areas to adjust are listed below (see the general DMO tutorial for details):
- Adjust the variable modifications (common histone modifications and chemical derivatization used in sample prep)
- Adjust the rare modifications (specified as detailed mass offsets) using the “Edit Detailed Mass Offsets” button in the Mass Offsets section of the MSFragger tab.
- Enable Match Between Runs (MBR) on the Quant (MS1) tab. This will reduce the number of missing values in the output using the MBR algorithm.
- Generate a Skyline document to view the results in a different way or to use for alternative quantification. To do so, check the “Generate Skyline Document” box on the Skyline tab.
- Run the Search by going to the Run tab, setting the output directory (where the results will be saved) and clicking “RUN”. The progress of the search will be displayed as it proceeds. For the default parameters, the search should take about 5-15 minutes (depending on the speed of your computer).
Analyze the Results
There are several different outputs that can be used to examine the identified peptides and glycopeptides:
- Quantified glycopeptides can be found in the combined_modified_peptide.tsv table.
- Click the Open FragPipe-PDV viewer button on the Run tab to see the matched MS2 spectra for individual PSMs.
- PSMs can also be examined in table form using the psm.tsv tables inside each experiment folder in the results. The psm.tsv has all the match and score information for the peptide and glycan.
To generate volcano and PCA plots, FragPipe-Analyst can be used. For this analysis, since the raw files are replicates of the same condition, PCA and volcano plots are not particularly interesting. Also note that FragPipe-Analyst does not yet support modified peptide or site-level results, but peptide or protein level results can be analyzed using the combined_peptide.tsv or combined_protein.tsv.
- Click the Open FragPipe-Analyst button on the Run tab to navigate to FragPipe-Analyst (it will open in a web browser).
- Set the mode to “LFQ”
- Upload the combined_protein.tsv and experiment_annotation.tsv files from your results folder and click Run.